
3D Thursdays are an on-going set of blog posts that dig into the world of 3D printing as we develop our knowledge and skills of the process and then present them to you to further both your understanding and ours.

An example of CAM software in ReplicatorG (image from MakerBot)
Since we began this 3D Thursday series, we’ve explained the basics of how it works, how to print pre-made objects and what exactly slicing means in regards to the design process. While the previous post outlined specific slicing settings, the following post will give a better overview starting with theory and ending with physical objects.
Now that we’ve covered those aspects, it’s time to expand our 3D printing knowledge. Rather than printing something via Thingiverse that someone else made, we began to design our own 3D objects in Google Sketchup. Sketchup is a similar design program to AutoCAD, except it’s significantly cheaper and much more user friendly for those who didn’t attend architecture or engineering school.
You can give the software a try with a free trial run, but if you plan on creating your own prints regularly, you’re going to need a program like this for 3D modeling. AutoCAD is generally thought of as software for creating blueprints, but also has the ability to do 3D design like Sketchup. While AutoCAD may appear cheaper looking at their respective sites, keep in mind purchasing Sketchup is a straight license, whereas AutoCAD is a subscription service that requires payment at a monthly, quarterly or yearly rate.
Once you have a design made and ready to be converted into a 3D file, it’s time to use a computer-aided manufacturing (CAM) program that converts the file types into .STL and GCode format that the 3D printer can read. There is a variety of programs that can do this, with many of them being free open-source software that anyone can download and use. These programs are mentioned in the previous slicing post, which you can view here.
We’ve mentioned Slic3r as one of these programs and we have also used ReplicatorG. We have found it very intuitive and self-explanatory. While there is a learning curve for these programs, a trial-by-error approach is best anyways since every 3D printer seems to have its own temperament and small quirks that need to be adjusted on the fly.

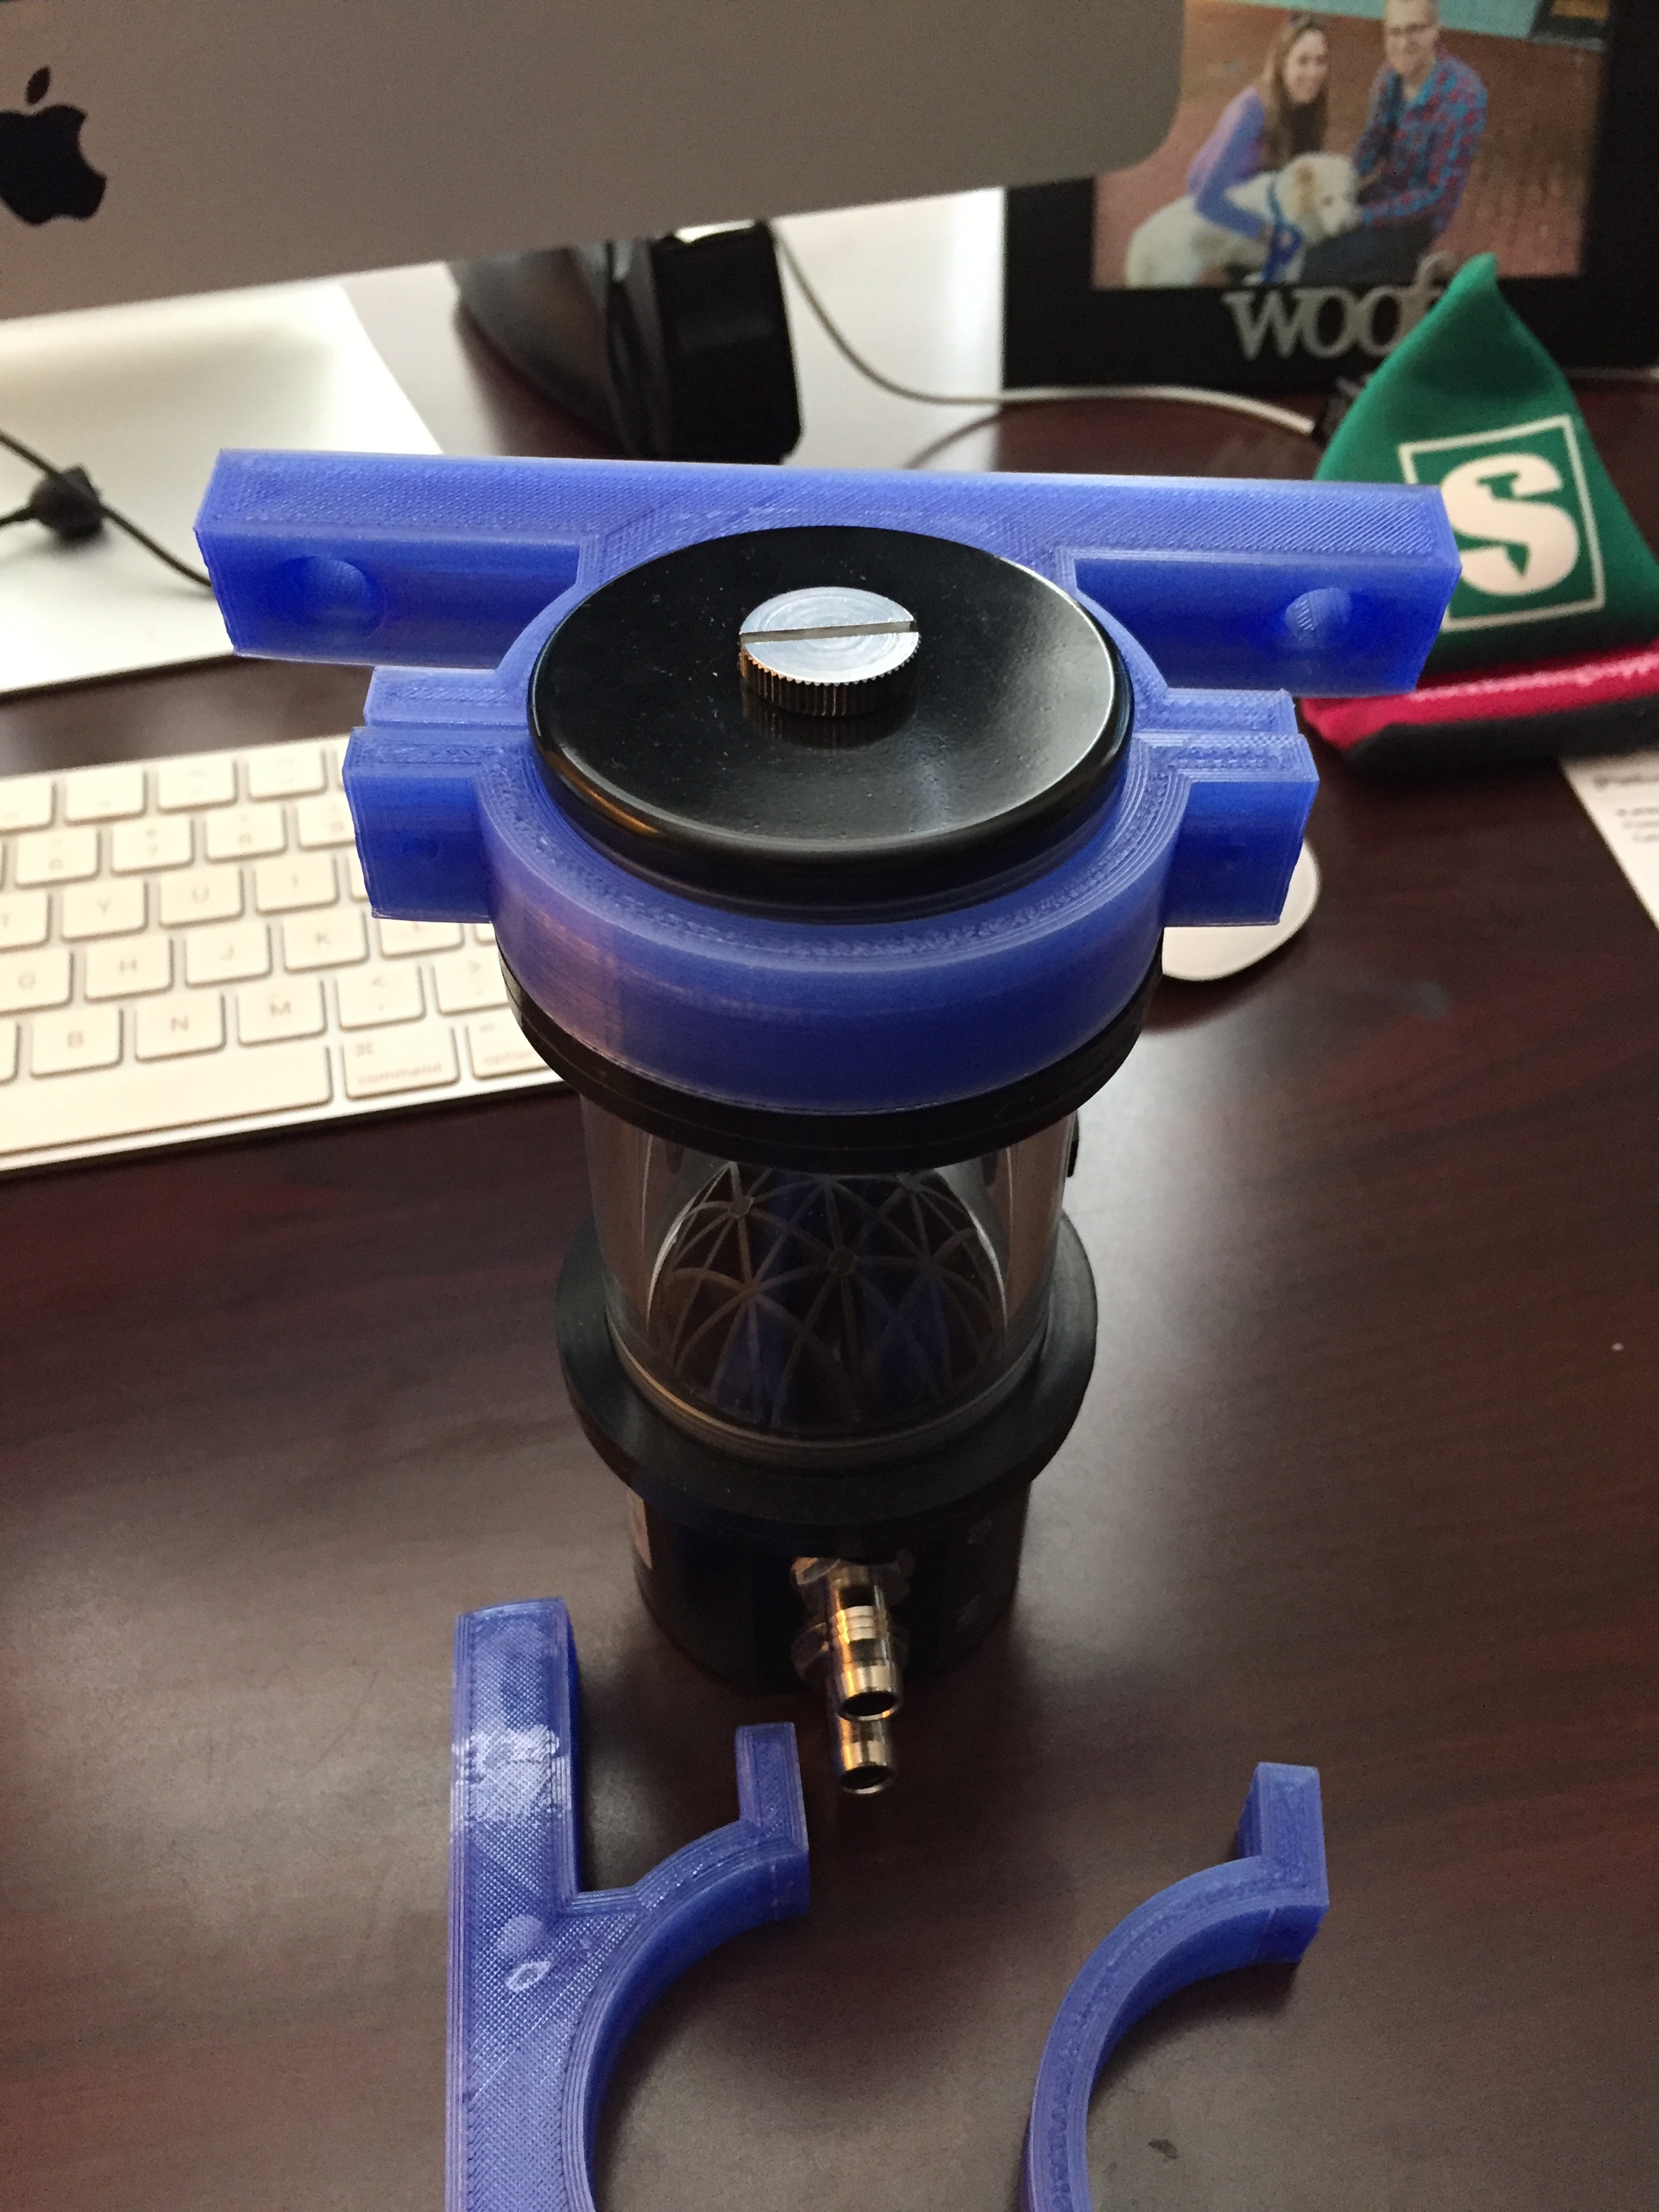
Now that we’re out of the explanatory portion, let’s show you some items that we designed from scratch. The first is a bracket of sorts that mounts a water pump onto our CNC machine so we can use a water-cooled spindle with our machine. The pump needed to be close to the spindle, so we made a 3D object that would allow the pump to move with the spindle, whether it was side-to-side or up and down.
The design process was fairly simple and required a few measurements of the water pump itself. We needed both the outer diameter dimensions of the pump as well as its depth to ensure the mount stuck out far enough to avoid entanglement with the Z-axis.
We also had to ensure the proper size holes were in position for the attachment to the axis and the secondary piece to connect to the main piece. Luckily the filament can be shaved down quite easily without ruining the object, so threading a screw through that is slightly too large isn’t a huge problem. The first print through proved to be slightly too small on the inside of the curve, so with some tweaking to the arc, the second print was spot-on.
The other pieces we made for our CNC machine were bracket mounts for an external cooling fan. These pieces were much easier to design and print, since they were essential just ‘L’ shaped pieces with the necessary depth for holding the fan and holes for attaching the fans existing holes to the brackets. Once again, our first print didn’t quite lineup, but a slight revision was just enough to make it work.

Lastly, we also designed a case for a piece of electronics called Raspberry Pi that we needed to install inside an old PC. The case required several specific openings to allow for cable connections of the Pi device as well as four exact holes that lined up with the PC’s motherboard to screw it in place without hurting the existing electronics. This design was one of those trial-by-error pieces that started extremely frustrating.
While we were able to get exact measurements for the Raspberry Pi itself, the more difficult measuring came to the attachment inside the computer. The screw holes took at least four prints, which we were able to stop early into the process when we noticed it wasn’t lining up. Eventually the device was both able to slip into the case as well as lineup with the screw holes, which is obviously the intended goal and end result we wanted was the computer booting up properly and all electronics starting up. Once it was all fitted in place, we were finally able to breathe a sigh of relief for completing this phase of learning 3D printing.
Our above-mentioned designs can be found on my Thingiverse account here. Feel free to download any of our personal creations or our remixed ones. If you make any of them, leave a comment or suggestions for improvement if you have any.